Cloudflare Mesh, Cloudflare Tunnel, Cloudflare WAN, Cloudflare One - Manage all your routes from one page in the dashboard
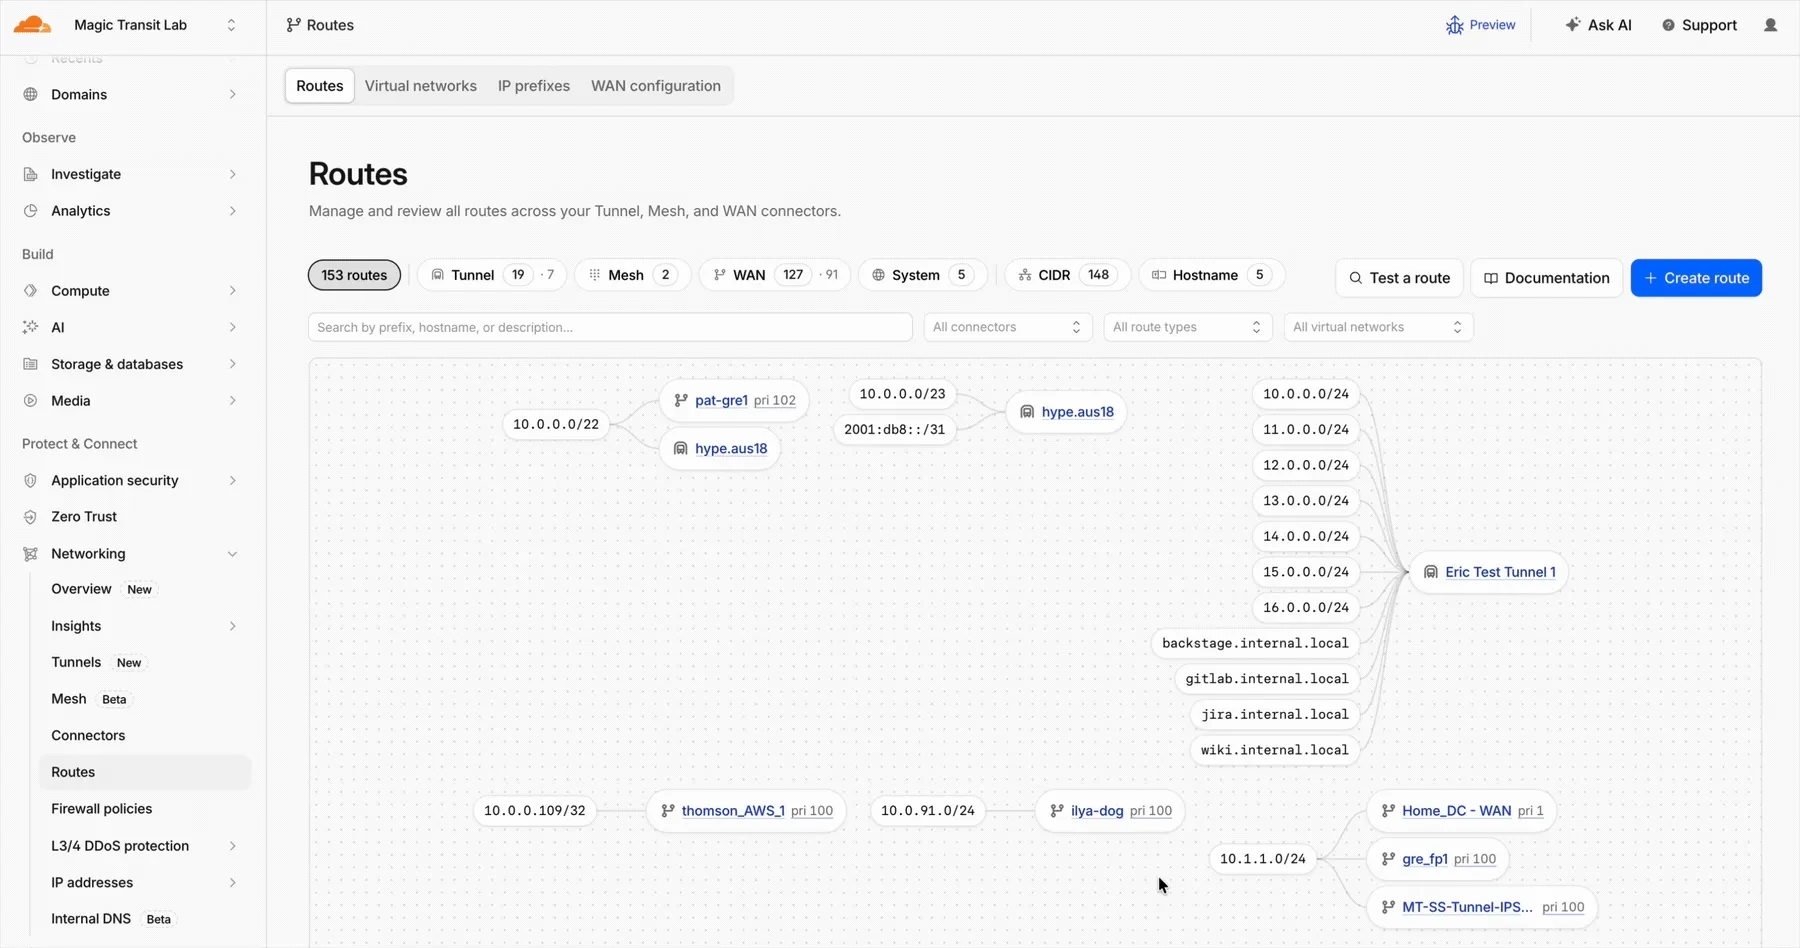
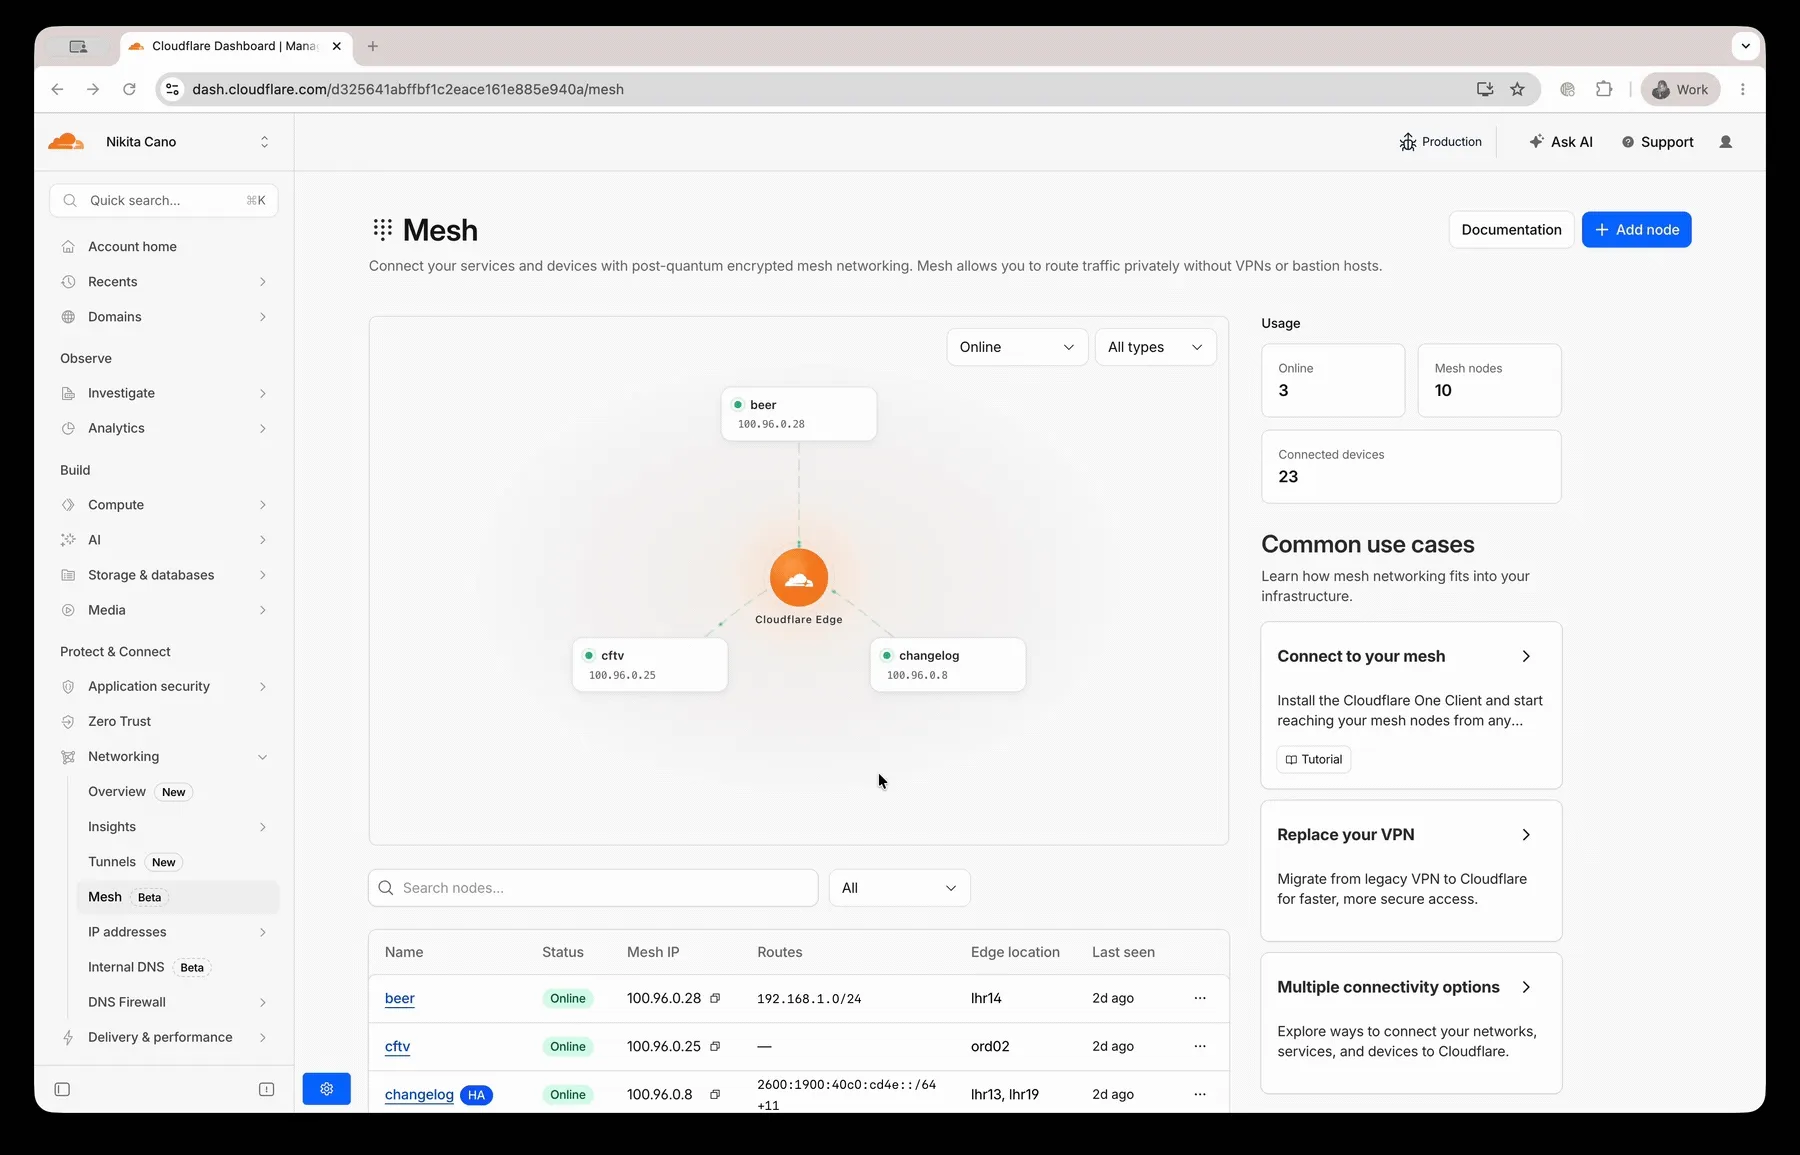
The Routes page in the Cloudflare dashboard now shows the routes across all of your connectors — Cloudflare Mesh and Cloudflare Tunnel routes alongside Cloudflare WAN and Magic Transit static routes — in a single table, instead of a separate routes view per product.

From the unified Routes page you can:
- Visualize your network with an interactive map that shows how your destinations flow through to your connectors — including equal-cost multi-path (ECMP) routes where the same prefix is served by several connectors. Select a node to filter the table down to the routes behind it.
- See every route in one table, with its destination, type, connector, priority, and source, and filter or sort to find what you need.
- Create, edit, and delete routes of any supported type without leaving the page. When adding a Cloudflare WAN or Magic Transit static route, you now pick the next hop by connector name instead of typing its IP.
- Manage virtual networks from a dedicated tab.
- Test a route to see which connector and next hop a destination resolves to before you commit a change.
To find it, go to Networking > Routes in the dashboard sidebar.
Your existing routes, APIs, and configurations are unchanged — this is a dashboard experience that brings them together in one place. Learn how to add routes and manage virtual networks.
Fetched June 19, 2026